It’s not a secret that I try to avoid marking out quilting designs. It takes time and then, when I miss the mark, I still have remove the markings…..which tends to make me a crabby quilter, and no one wants that!! So, instead of marking, I like to use reference points on the quilt to create intricate looking designs…..I call this Dot to Dot quilting and it’s such a fun way to work on quilts.
Today’s quilt is an extreme version of Dot to Dot machine quilting, but it still uses the same concepts……let me show you what I mean.
First, the quilt!
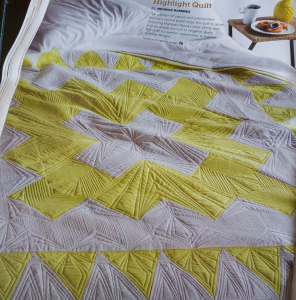
Highlight by Nichole Ramirez
The Highlight quilt, featured in Modern Patchwork, was designed by Nichole Ramirez. When she sent it to me for quilting, I knew I wanted to use some modern, geometric quilting to highlight the piecing….pun, intended.
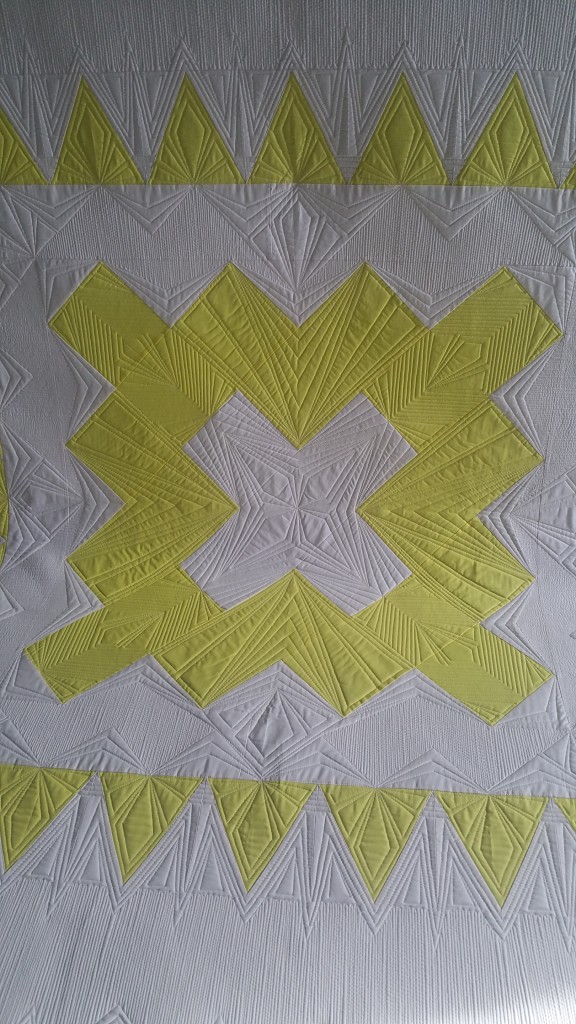
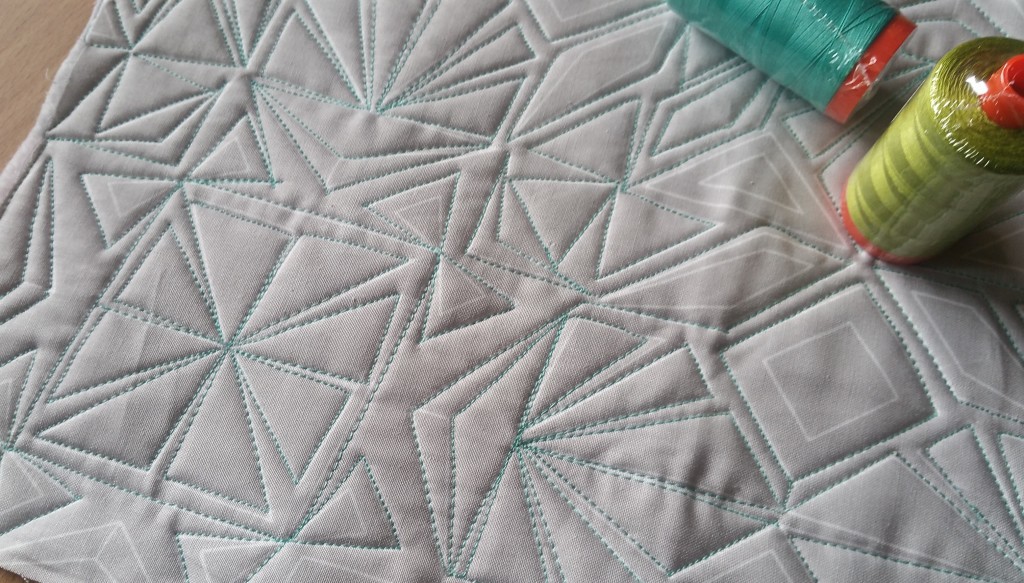
The center of the quilt is made up of large-scale piecing, so I had to quilt lots of lines to fill in those big blocks. Here are a few more detail shots of the quilting….then I’ll show you how I actually quilted some of the blocks.

Talk about lots of negative space!

Some corner detail…..

What can I say, I love quilting quilts to death! It took forever, but I was so very happy with how it turned out….even if I was a little tired of quilting straight lines when I was finished!
Dot to Dot Machine Quilting Tutorial
While I could go into detail about how I quilted the whole quilt, I don’t think anyone would have time to read it all. So, I picked a couple of examples to share with you….one inside the block and one outside of the block. Even though you might not make this exact quilt, you can still apply the concepts to your quilts!
Dot to Dot Borders
For this example, I am showing how I used the blocks and a seam to create an intricate looking border design.
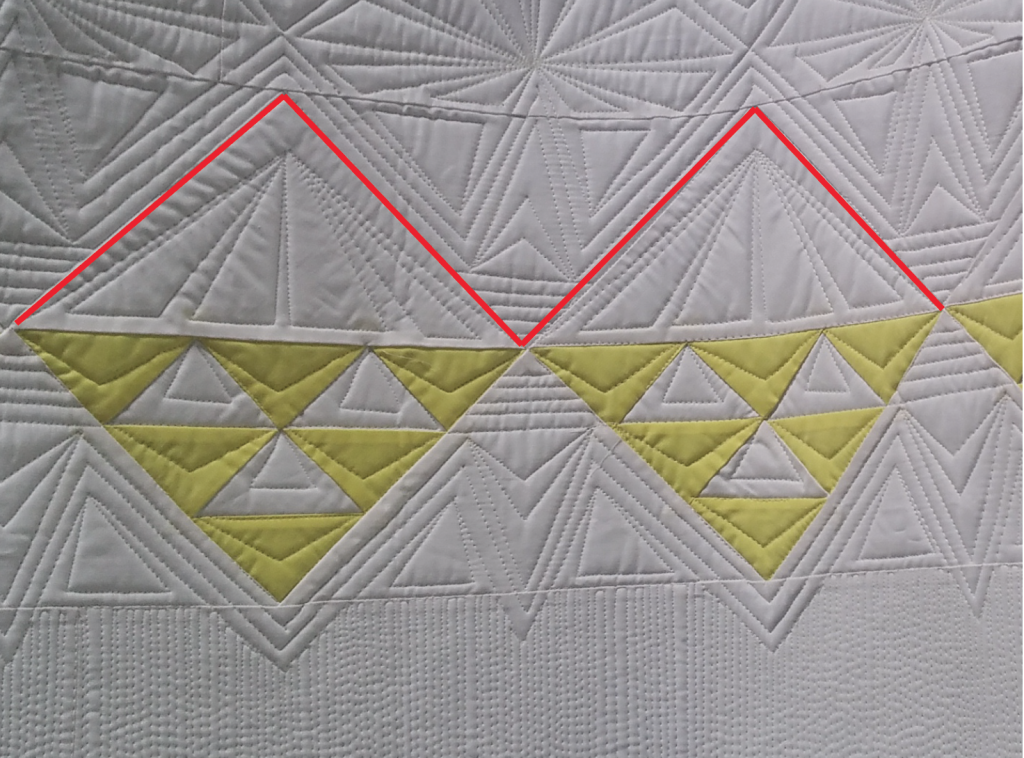
Step 1
- First, I started at an outer corner of a block and quilted a diagonal line up to a seam above the block. This seam, which might be hard to see in the picture, is part of another border, and it’s the perfect reference point to make sure my diagonal lines end at the same height. Once I hit the seam, I quilted a diagonal line towards the other corner of the block, repeating in the next block.
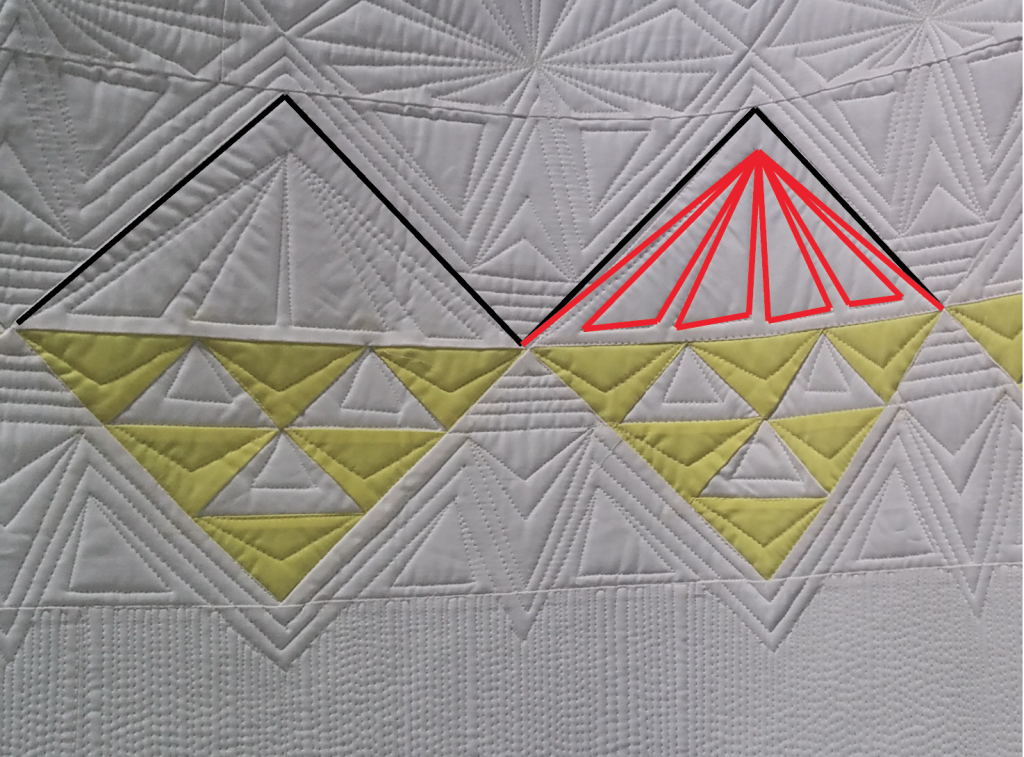
Step 2
- Next, working my way back from where I started, I quilted a diagonal line from the outer corner to a point about 1″ inside the point of the lines quilted in the first step. Before continuing onto the next corner, I quilted wedges that fill the area. Then, continued to the next corner.
- If you try this design, don’t worry about your wedges being perfect, just make sure the area is filled in. I always say that people will notice a gap in the quilting before they notice an error in the design.

Step 3
- Repeat in the next area, filling it in with wedges ending at the starting point. Again, I am not focused on perfection, but I am trying to make the quilting as symmetrical as possible. That means that I try to have the same number of wedges in each “block”
Dot to Dot in the Blocks
The technique works just as well in blocks as in borders. Quilting the triangle blocks was as easy as connecting the dots. With a little planning ahead, I was able to quilt the whole block continuously.

Step 1 and 2
- Quilting this block is as easy as going from triangle to triangle….with a little stitching in the ditch (SID) thrown in. SID is great for quilting down the seams of a block, and it allows you to travel around the block….making for more efficient quilting.

Step 3 and 4
- I just love how I quilted the block, stitched the seams and ended up opposite from where I started. That means I was able to continue right onto the next block. I just love quilting efficiently.
Dot to Dot FAQs
I have taught enough quilting classes to know what questions normally come up. Here are a few FAQs just in case you were wondering!
Do you use a ruler or a walking foot when quilting the straight lines?
I do use a ruler when working on my longarm, especially when quilting diagonal lines!
[shopify embed_type=”product” shop=”quilting-is-my-therapy.myshopify.com” product_handle=”hq-straight-edge-ruler-3-x-12″ show=”all”]
This is my favorite ruler to use! I love how it’s long enough to help me connect the “dots” and the 45 degree lines markings mean that I can make sure that my diagonal lines are all the same. (I have a few available for sale on my online store if you’d like to get your hands on one!
If working on a sewing machine, you could use your walking foot if you’d like. Just remember that you will be turning the quilt a lot. Try using the free-motion quilting foot, it will be quicker and you don’t have to worry if it’s not perfect. You are just going for straight-ish.
Do you plan out your quilting before you start?
Honestly, I don’t! When I started this quilt, I just started connecting the lines and had fun with it. I don’t mind the anticipation of wondering what it will look like when it’s done. But, if the thought of that makes you feel like you might break out in hives….then, definitely try planning it out a little beforehand. Do what makes you feel comfortable, this is supposed to be fun!
What if you make a mistake?
It’s not if you make a mistake, it’s when you make a mistake, there is no such thing as perfection in free-motion quilting. The best thing to do when you make a mistake is to keep quilting. There is so much quilting on this quilt, that no one will be able to notice any errors, all they will be able to see is the texture of the quilting.
Do you have a question about Dot to Dot quilting? Leave it in the comment section and I answer it as soon as possible!
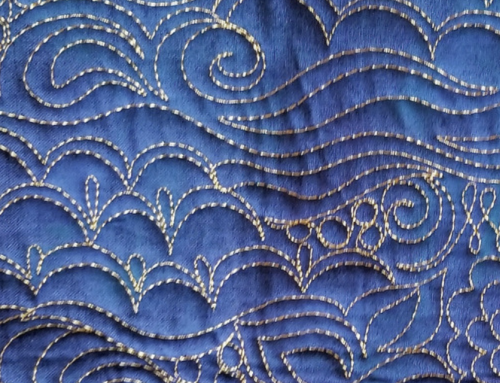
Training Wheels for Quilters

Not sure where to get started? Check out my Training Wheels for Machine Quilters. These kits come with fabric prints that are perfect for quilting along the lines. It allows you to practice some dot to dot quilting designs while ending up with a fun wholecloth quilt!
Whew!! That was a long post! If you are still reading at this point, thanks so much for supporting me and my blog!
Happy quilting!
What is the sewing machine you are using? Thanks
I’m hoping to find an answer here. I love a beach quilt you designed that is on pinterest. Stipey turquoise and gray and whites. Pictured on a beach. It says it comes from your second book. Which book is your second book? When I have researched your books it does not tell me the patterns or quilts inside, just quilting practices. Anyone know the answer, please? Thanks.
Hi! The quilt you are looking for is the Dead End quilt pattern in my second book, In the Studio with Angela Walters. Here is a link to what it looks like, hope that helps!! https://quilting-is-my-therapy.myshopify.com/collections/books/products/in-the-studio-with-angela-walters
I absolutely love doing this type quilting but I have a hard time describing it to my customers and letting them know what it will cost. What do you call it? Other than dot to dot. Would it me custom, heavy custom, heirloom, modern?
I am becoming your biggest fan! Just getting ready to purchase my own longarm machine, and you give me hope every time I read an article or one of your books that this IS the thing I have been looking for all my life. Like you I really prefer the quilting to the piecing tops together…. Thanks for your generous sharing of knowledge! Wynn
Of course!!! I am so glad that you find it helpful!!
“Quilting this block is as easy as going from triangle to triangle….with a little stitching in the ditch (SID) thrown in. SID is great for quilting down the seams of a block, and it allows you to travel around the block….making for more efficient quilting.” I frequently use a 40 weight Magnifico thread which has a little sheen to it. Would you be able to SID with that or would it be too obvious? Thank you for sharing your wealth of knowledge. It is so generous of you.
This is a great tutorial. Very clear directions. Thank you so much for sharing!
Thank you for sharing! I’m a new long arm quilter and I love your books, blog and videos. Very inspirational! I only wish I was close enough to attend a class with you. 🙂 Best wishes, and keep up the good work! Your quilting is beautiful.
Where do you live? I travel quite a bit, who knows, I might be in your area sometime??
Love when you share. You are so talented and make it all look so easy.I keep practicing….one day it will happen….
I have taken your Dot To Dot class on Craftsy. It is a very informative and fun class.
Thanks so much!! I am thrilled that you like it!!
What do you do to keep all the layers together? Do you pin, use glue spray or baste with stitches?
If I am quilting on my sewing machine, I like to use fusible batting….probably because I am too lazy for pinning. Hope that helps!
Thank you for the tutorial. I love the idea of dot to dot quilting and use it often. I love your books and refer to them often. I converter your shape by shape books to spiral binding to make it easier to use. Thanks for all you share from years of quilting.
I love your quilting, wish I could send my quilts to you, but I do use your awesome books to “try” and mimic your wonderful work, Thank you for sharing your skills.
Thank YOU for reading my blog, I appreciate it!!
Thank you for this tutorial. The quilting is stunning. Because of a recent IG post of yours, I am having more fun fmq!
Hi Angela….I have a question, if you don’t mind. When you do ruler work on a sit down mid arm, do you use a ruler foot or the hopping foot? I’ve done a little with the hopping foot with no problem, but r adding a lot about these ruler feet, and a little anxious now ….don’t want to buy one, but don’t want to damage my machine
Thank you
I use the regular hopping foot on my sitdown long arm. But I make sure to use rulers that are thick enough not to slide under the foot while quilting. What type of machine do you use?
Angela, nice quilting, as always. I am working on a very modern quilt and you have given me some ideas with this work, as well as your second Dot to Dot book! Thanks for sharinging your skills and knowledge with us!
Angi
I just love your quilting without any marking, and the fact you don’t worry about mistakes. I have one question, in the triangle section you showed above when did you quilt the triangle seam line in the section where you put the small triangles? Also do you ever quilt seam lines first then go back and quilt the fill patterns?
I also have a question about stitching every seam line…do you stitch “every stinking seam”? Just wondering. Nice work, as always, Angela.
I like stitching in the seams because I use them to work my way around the quilt. Sometimes I won’t get all them done, but I usually end up with most of them. But it’s totally a personal preference, you don’t have to do it!
I usually do the outer lines first and then fill them in with the rest of the quilting. Hope that helps!!
Wow! I’m not a great quilter, but you make me want to try this on something smaller. Thanks for such a clear explanation.
Yay!! Go for it!! I hope you will send me a picture of what you end of quilting!!
Thanks for sharing! You have giving me the confidence to just go for it!!
Awesome, as always. Thank YOU for taking the time to share! You are very inspiring.