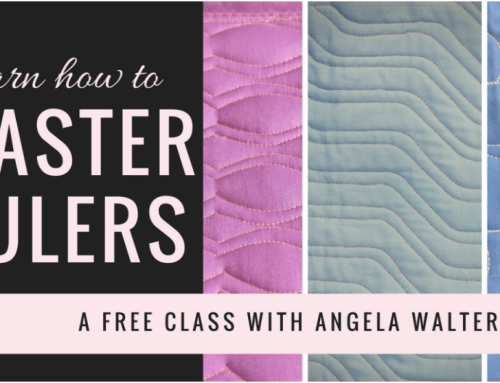
Want machine quilting inspiration, a free tutorial and an in-depth video that shows you how I quilted this amazing quilt for Tula Pink? If so, keep reading!
Quilting A Quilt for Tula Pink
So what do you do if amazing fabric designer, Tula Pink, brings you a quilt to machine quilt for her? Get excited, of course. But what do you do if it’s an exquisitely detailed quilt that she english paper pieced? Well, then you get a little nervous.
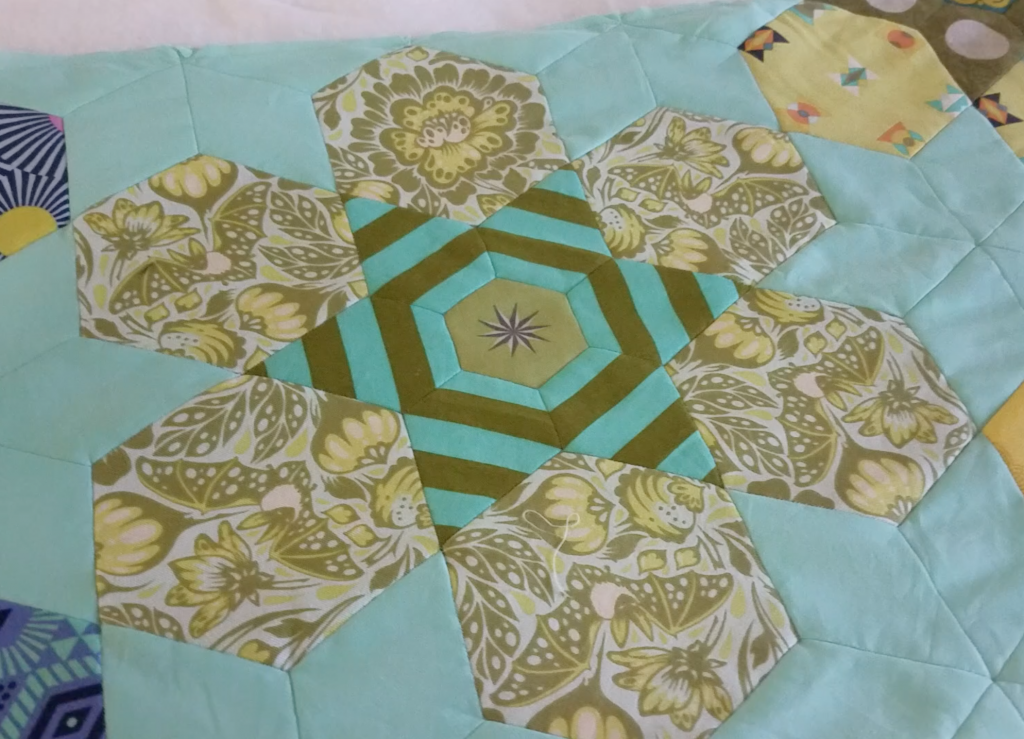
Tula Pink’s AMAZING Bloomers Quilt
I have been quilting for Tula Pink for almost 9 years. Besides quilting her quilts, we have been friends and have even wrote a book together. Each of the quilts that we have collaborated on over that time have been such a fun challenge to work on. I like trying to come up with interesting and maybe even crazy ways to quilt each one better than the last. This latest quilt, Bloomers, is no different.
Getting over Quilter’s Amnesia
Even though I have been a professional machine quilter for a long time, I sometimes still get stumped on what designs to use on a quilt. If you have even machine quilted a few quilts, you probably have run across that feeling as well. I like to call it quilter’s amnesia. It’s what happens when you finish a quilt top and forget every quilting design you have ever learned…..it sure isn’t fun!
If you are are suffering from a case of quilter’s amnesia, here are a few machine quilting tips to get you going!
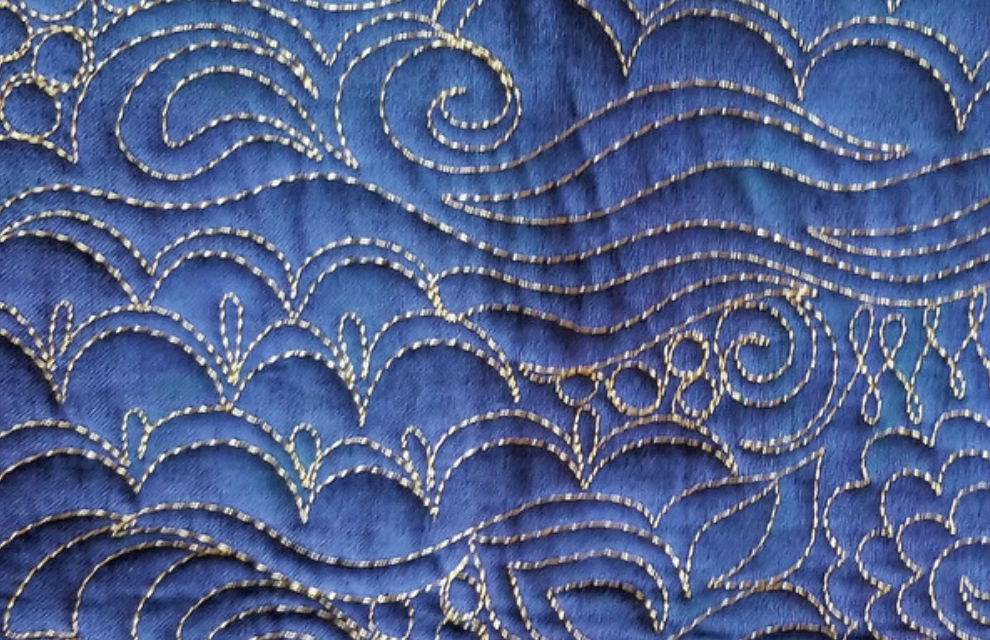
1. Use Dot to Dot Quilting designs.
Even though I want to quilt intricate looking designs, I want to do it as quickly as possible. Connecting “dots”, or reference points on a quilt, is an each way to create geometric designs that really fit the piecing. In fact, most of the designs I quilted in Tula Pink’s quilt used variations of this technique.
Dot to Dot Quilting Designs are a quick way to quilt blocksThe best thing is that you don’t have to have the whole design planned out before you get started. You an just start connecting dots and see what you come up with.
I used the points of the star and the center of the block to create this particular design. I really love the way it breaks the block up into smaller shapes….too much fun!
Free Downloadable PDF Quilting Tutorial
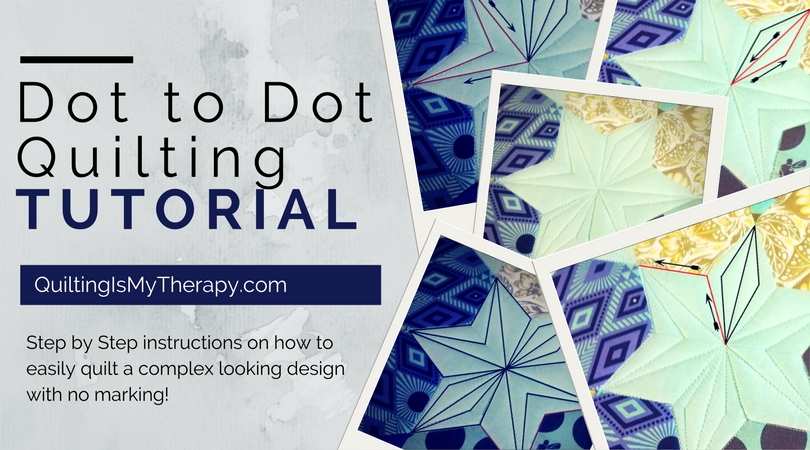
If you’d like to see just how I quilted it, I have a downloadable step by step tutorial you can get by clicking here. It’ll show you step by step how to quilt this designs. I promise it’s much easier than it looks!
2. Follow the lines…in the fabric, that is.
Quilting around the tiny birds is a great way to show off Tula Pink’s fabric prints.Quilting beautiful fabrics is as easy as following the lines. If you think about it, you bought the fabric for a reason, let’s show it off! Quilting around the designs will make them “pop” up just a bit, especially when combined with filler quilting in the rest of the blocks.
Don’t feel like you have to quilt around all the different designs on the fabric. Highlight your favorite parts and quilt a filler in the rest of the area. This is especially fun if there is a hidden, or less obvious, design in the fabric.
Amazing design by Tula PinkWhenever I work on one of Tula Pink’s quilts, I know that she has done most of the work already. Her beautiful fabrics are the perfect canvas…I just have to follow the lines she has left there for me.
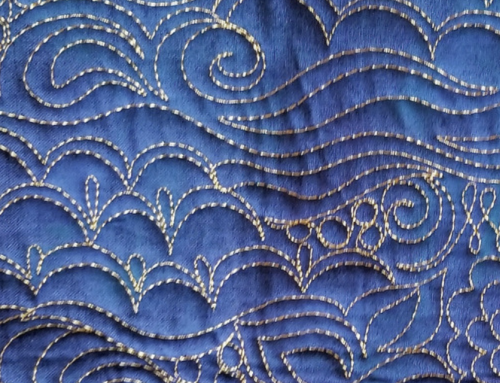
3. Use designs with different textures.
It may sound too simple, but I really love using designs with different textures next to each other. I suppose I could say something artistic, such as ‘the juxtaposition of the designs really completes the composition” but, nah….that’s not why I do it. Using designs with different textures keeps me from getting bored and really highlights the patchwork of the quilt.
For instance, if I used a geometric design in one part of the block, I tried to use a curvier design in a different part.
Straight lines combined with swirls? Yes!
Diagonal Lines and SwirlsDot to dot quilting with a swirly center? Love!
Of course, this is completely a personal preference….I am only the expert of my own opinion after all.
4. Keep a snack close…..but not too close!
I mean we need nourishment, right?!? (disclaimer: The quilt was not harmed during the quilting process and the wine was kept well away from the quilt)
5. If you make a mistake…..keep going.
Machine quilting is supposed to be fun. It’s not the punishment for finishing the quilt top….it’s your reward! If you are quilting a block and don’t like how it looks, quilt the next block differently. Besides, having several different designs makes the quilting more fun to look at!
I should point out that I use a 50wt. thread. It’s thinner so it blends in nicely with quilt and keeps the quilting from overwhelming Tula’s gorgeous piecing. Especially if I am quilting several different designs on a quilt.
Matching thread colors to the quilt.Deciding which thread to use is a matter of opinion. But for most quilts, I use either Superior So Fine (a 50 wt poly) or Aurifil 50wt cotton.
A Peek into the Quilting Process:
I thought it would be fun to give you a peek into what goes into working on one of Tula Pink’s quilt from start to finish. So, I put together a vlog post that let’s you into my crazy life. You will also see the whole quilt top, before and after it’s quilted…..talk about eye candy!
If you like the video, I hope you will subscribe to my YouTube channel. I plan on making more of these and I’d hate for you to miss even a single, fun episode!
*Don’t forget to download my free tutorial to see how I quilted part of her quilt step by step!
Happy Quilting!
Hi! Have watched you for ever! I think I have just about all your craftsy classes! Just got an Amara! Do you float your top? Thanks!
That quilt is gorgeous. Go you!!
Thank you for sharing your secret about the two layers of batting, showing us the teeny-tiny triangle piece, and sharing your sometimes-doubts about certain design choices. Your insider’s thoughts, along with tips & tricks, during your videos that made them special and me a subscriber. You let us newbies know that even when we’re watching a master at work it’s okay to not be perfect out of the gate. You’re great!
Love the quilt but it’s driving me crazy……how big are the hexagons?
They are small! About 2″ or so, I can’t remember exactly!
I bought your book ‘Shape By Shape’. It has great ideas. I’m an older quilter and have tried to quilt my own quilts for a number of years. I find your designs much simpler than some I’ve tried in the past. Still can’t do swirls and hooks.
Just keep practicing, it gets easier, I promise!
Perfect article, thank you. Lov lov Tula Pink fabric and your quilting is right on, it’s no wonder you have quilted for her for so many years. Two creative souls!! Please come to Phoenix again and teach classes.
You did an amazing job quilting the Bloomers quilt. I love the different designs. They bring so much depth to Tula Pink’s already amazing quilt.!
I love it! And I will definitely go with 2 layers of batting on my next quilt. When I first saw the quilt, I wasnt sure I liked the fabric, but the quilting made everything pop! Thanks for sharing that!
I just love to watch all your video’s and see how amazing all your projects come out!!! I also appreciate your honesty and encouragement for us beginners!
Really lovely Angela! I love your energetic full life …it shows in your quilting! I have only had my long arm a couple of months and your video is so helpful .. Safe and joyous travels to you and yours!
I absolutely love your videos! I can’t get enough! You inspire, encourage and are so entertaining. The quilt is gorgeous and I think the next quilt I do I’ll use two layers of batting, I just love the way it poofs up! Thank you so much for showing how you come up with your designs!
Fantastic work. Love your energy and your fun videos. Thanks
What beautiful inspiration you bring! I was just taking a lunch break from quilting a quilt at home, and tuned in to watch you and your quilty work. Holy moly, you got me re-energized to keep bringing the flow back to my work! Thank you!
What amazing quilting. Is there any chance you could post a picture of the back of the quilt? I always look at the back of quilts at shows.
I will admit I watched this video at first for the quilting tips and to see Tula’s beautiful piecing, but loved the part with your kids (they are so cute and good sports)! One of the more entertaining sewing videos I’ve seen in a good long while. Glad you had a great time in Alaska HEY, next time stop by the La Conner Quilt museum. (maaybeeeeee give a workshop????? hint, hint) Yes, in my neighborhood lol. Thanks for filming this, was very helpful for me (beginner longarm) Cheers!
The piecing and quilting on this one is amazing. I love this quilt!!
Love it. Tula has an amazing talent with color and of course her fabulous patterns. Thanks so much for always being so open and free with you talent. I’ve loved watching you soar over the past few years. Keep up the amazing work.
Breathtaking quilt!!
Hi Angela. This is beautiful! Thank you for once again sharing your process and reminding us to have fun.
I love watching your videos and reading your tutorials – fabulous, inspirational, thank you.
Oh My Goodness! I have tears of joy in my eyes seeing the beauty in this quilt! It inspires me to try new techniques, choose fun patterns, to fussy cut and attempt EPP. As a complete newly to the quilting world, Angela- you bring quilting into the 21st century, modern and fun. Thank you for your “Go For It” and encouraging attitude. I am a fan.
Gorgeous! I loved watching you quilt and your designs are so inspiring and helpful.
I have watched that video over … and over … and over again. Every time I feel a little low on inspiration or motivation, I watch a video of you on your longarm, and bam, I feel inspired again! Thank you for being such a wonderful inspiration. Quilting has been amazing therapy for me, and I owe it to you!