
Create Intricate Looking Designs by Connecting the Dots
Before You Start
Week 1: The Diamond Design
Week 1 starts with a fabulously versatile design, the Diamond design. This design can be used in so many different ways on all different kind of quilts! I especially love to use it in square and triangle shaped blocks of all sizes.
If you only watch one lesson of this whole challenge, this is the one to watch!
Click here for the downloadable quilting diagrams and tip sheet.
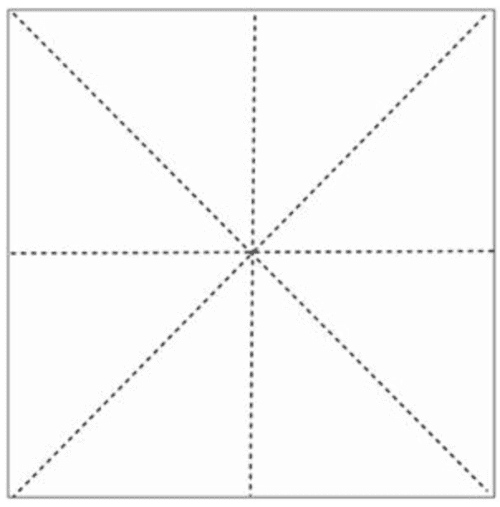
Week 2: The Starburst Design
In this video, we are working through the second challenge of the series, the Starburst design. You’ll learn how to draw attention to the center of your quilt block, see how to use a ruler (or not) to create the straight-ish lines of this design and be inspired by several variations and maybe even come up with a few of your own.
Click here for the downloadable quilting diagrams and tip sheet.
Week 3: Diamond Design Variations
In this week’s challenge, we are going to take our quilting skills and apply them to bigger blocks.
In this video, you’ll learn how to create even more variations of the Diamond Design, learn how to use the dot to dot technique inside and outside of your blocks and watch as I demonstrate how to quilt it on a sewing machine (with and without a ruler) as well as on a longarm
Click here for the downloadable quilting diagrams and tip sheet.
Week 4: Starburst Variation
In this video, you’ll see how to create even more variations of the Starburst Design. These variations will hopefully inspire to add your own twist to the technique.
I’ll also show to use a ruler (or not) to create the straight-ish lines of this design and show you how to use the dot to dot technique inside and outside of your blocks!
Click here for the downloadable quilting diagrams and tip sheet.
Week 5: Dot to Dot Borders and Backgrounds
In this week’s challenge, we are going to learn how to quilt the borders of our quilts efficiently with some amazing looking designs. Be inspired to approach your borders in a completely different way!
You’ll see how easy it is to quilt amazing border designs with the Dot to Dot technique as well as learn how to make your own variations of the design. I’ll also demonstrate how to quilt it on a sewing machine (with and without a ruler) as well as on a longarm
Click here for the downloadable quilting diagrams and tip sheet.
Week 6: Dot to Dot in Between Blocks
Dot to dot quilting isn’t just great for blocks and borders, you can use it in irregularly shaped areas as well! I’ll show you how to do it in a few easy steps
In this video:
- See how to apply the Dot to Dot technique to irregularly shaped areas on your quilt.
- Learn how to make your own variations of the design.
- Be inspired to approach your quilts in a completely different way!
- Also see how to finish your challenge quilt.
Click here for the downloadable quilting diagrams and tip sheet.