
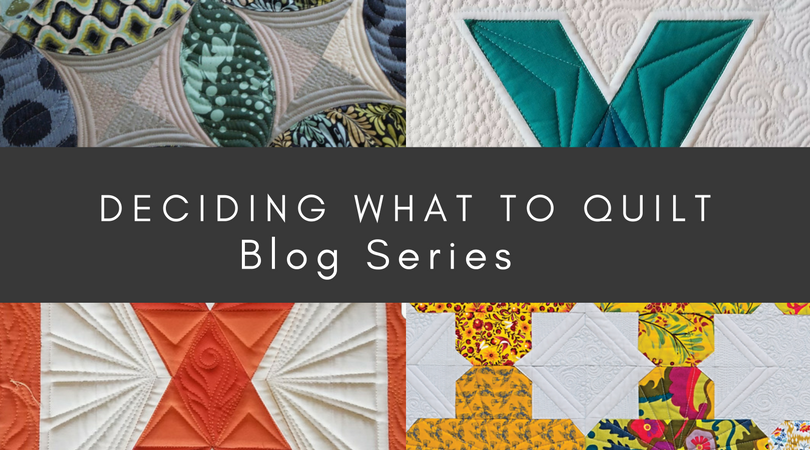
Deciding What to Quilt – A New Blog Series
Have you ever looked at a beautifully pieced quilt top and thought, “I have no idea how to quilt this!”
Deciding what quilting designs to use on a quilt can be harder than actually quilting it…..well, sometimes! I am a professional machine quilter and I still have difficulty deciding what to do from time to time. That’s why I am starting a new blog series, “Deciding What to Quilt”.
Over the next 5 posts, I will share practical tips to help you choose quilting designs for your quilts. My hope is that by time we are finished, you will feel ready to tackle some of those unquilted tops that you might have lying around.
There’s no wrong answer!
Before we get to the quilty pictures and tips, I want to first clarify that I am only the expert of my opinion. Ultimately, you should quilt whatever you think looks good….because you are the expert of your opinion. There is no wrong way to quilt your quilts!
If you want to quilt an allover design….do it. If you want to give yourself carpal tunnel and quilt tiny pebbles over the whole quilt…….um…..sure, go ahead and do it.
But, if your inner expert isn’t being too talkative and you aren’t sure what you want to do…here are a few things to help get you started.
Deciding What to Show Off
Before you even start thinking about what quilting designs to use, first determine the most meaningful thing about the quilt top itself.
It could be a number of different things, but the most common include:
- The Pattern
- The Fabric
- The Recipient
- The Quilting
- The inspiration or the story behind the quilt.
Once you decide what that most important element is, you can use the quilting to really show that off.
During this series, I will cover each of these things in a separate blog post. Today’s post focuses on how to use quilting designs to highlight the quilt pattern.
Highlighting the Quilt Pattern
More often than not, the quilt pattern is the most meaningful part of the quilt. Probably because that is what we spend the most time on. The cutting, sewing, ironing and intermittent cussing all culminates in a quilt top that you can help but be in love with.
Perhaps it’s an intricate pattern that you F.F.F. (finally freaking finished). It could be a pattern that you made with a friend or maybe it’s a pattern where all the points actually match.
No matter the reason, the good news is that putting the focus on the quilt pattern is easier than you might think.
Here’s just few tips to get you started in the right direction:
Echo, echo, echo
Echoing the quilt blocks is a great way to separate them from the filler and puts a little extra emphasis on them. As a bonus, echoing repeats the basic shapes of the pattern put even more attention on them. But my favorite thing about echoing……it’s not too hard to do!
Here are just a few examples of where I have used echoing to put the focus on the quilt pattern.
This block from Julie Herman’s Alphabet soup book (which, by the way, is an amazing book) show how echoing around the block separates it from the filler.

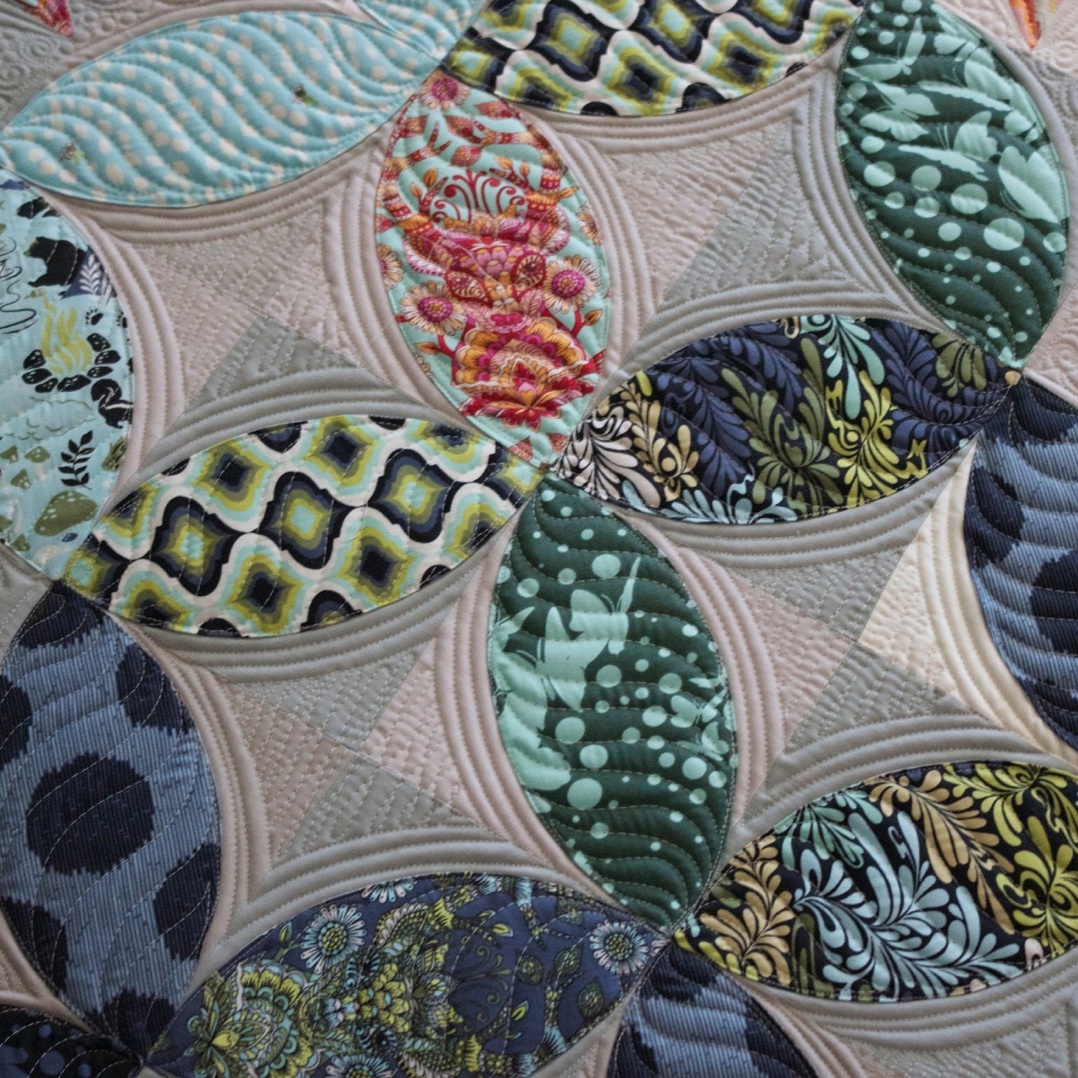
Echoing doesn’t necessarily have to be outside of the blocks, you can echo inside the blocks as well. In this Tumbler quilt from the book I wrote with Tula Pink, “Quilt with Tula and Angela”, I used different spacing between the echo lines to really highlight the optical illusion effect of the quilt.
For Tula Pink’s “Reject” quilt which is in my book “Quilting Is My Therapy”, you can see how echoing inside and outside of the block creates a lovely effect.
Keep it basic in the blocks.
It may seem counterintuitive, but when I want to show off the quilt pattern, I tend to keep the quilting designs in the blocks fairly basic.
If the quilting inside the quilt block is too busy or overly complex, it can detract from the piecing. This isn’t a hardfast rule by any means, but it’s a general rule of thumb for me.
Of course, the term “basic quilting design” is subjective. But the good news is that quilting more basic shapes in the quilt blocks means you can get done with the quilting faster!

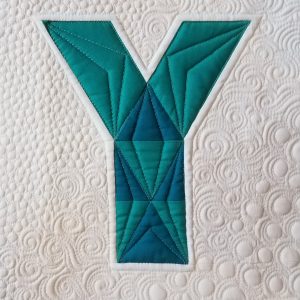
In Alison Glass’ Ventana quilt, I quilted straight lines that radiate from the center of the block. Since they are less densely quilted than the background, they almost “pop” off the quilt.
This quilt by Tula Pink is a great example of using echoing around the blocks and a gentle serpentine line inside of them. This really helps show off the curvy quilt pattern.
Using the quilting in the background to draw attention to the blocks.
What you put in between the quilt blocks can be just as important as what you put inside of them. You can use the quilting to draw attention to several quilt block or just a single one.
For instance, I quilted the same two “X” blocks in different ways, with completely different results. (Both from Alphabet Soup by Julie Herman)
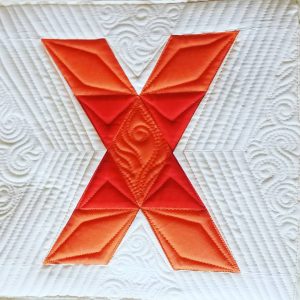
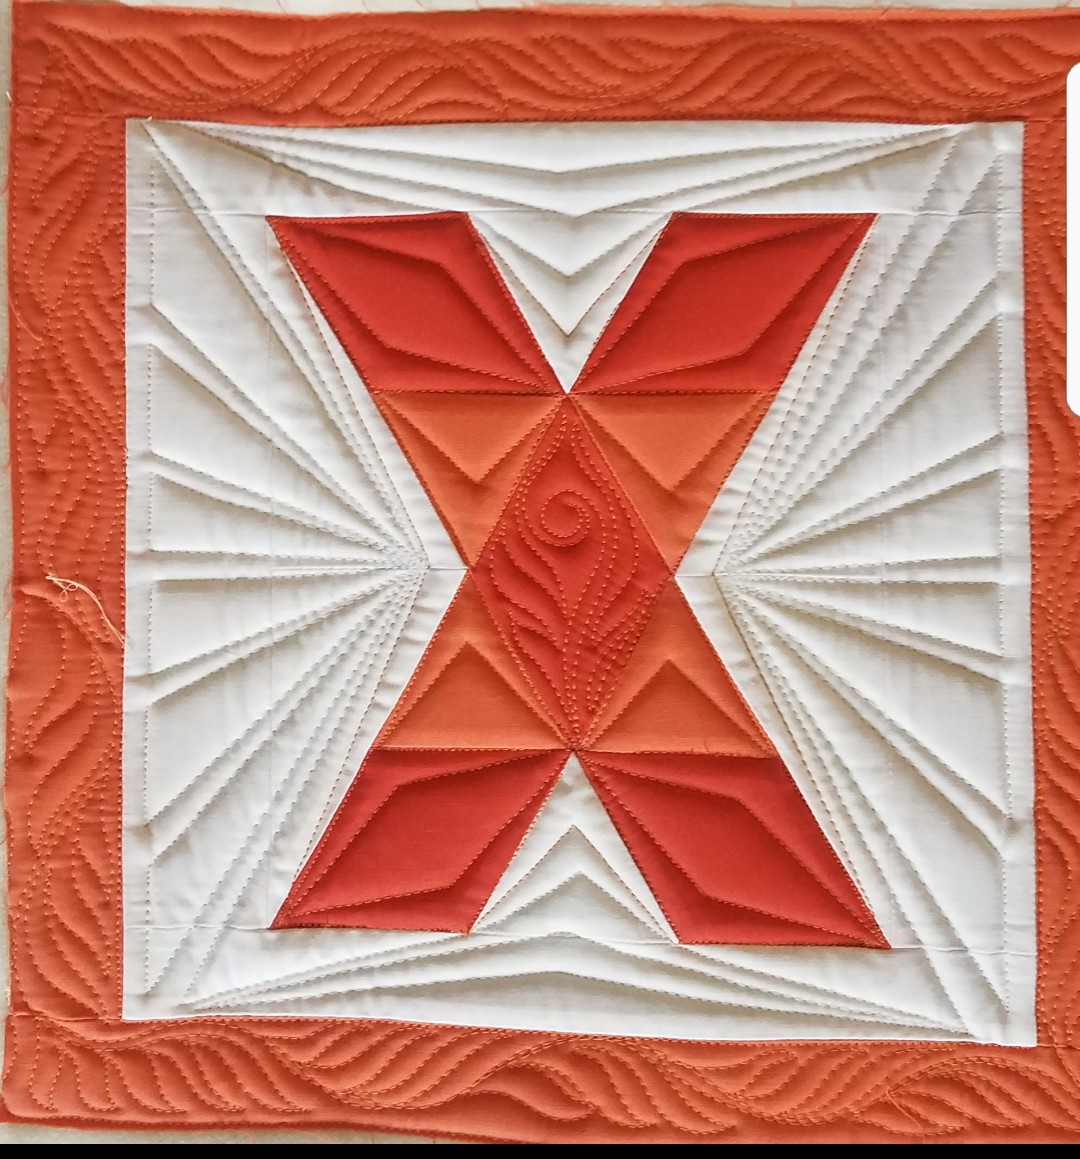
In the one on the right, all the lines come to the center of the block and practically shout, “Hey, this is where I want you to look” But in a completely nice way, of course.
On the left, I quilted lines that echo the sides of the center X. Which one is the right way? Both, of course!
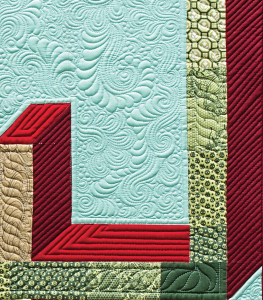
You can also recreate the quilt blocks in the negative space with you quilting. This is one of my favorite ways to quilt backgrounds.

With Emily Cier’s crapehanger quilt, I recreated the strips in the background and quilted them just as I would have quilted the blocks.

Your Turn!
Remember, these aren’t set rules, they are merely suggestions to get you started on your quilts. Let me know what you think or if you have tips for picking out quilting designs for your quilts.
Happy Quilting!
As someone who likes a less densely quilted quilt that seems to be popular these days, I’d appreciate suggestions and examples of less dense quilting that isn’t just stitch in the ditch. Thanks! I look forward to more.
Love your attitude. The videos are happy and inspiring and your explanations are so easy and complete. I also, enjoy the free motion part equally, if not more than the piecing. I am learning lots and have done a few different techniques, a lot are from my own head, no pattern used.
Thanks for everything you do, to help others, like me learn and become more confident in our own abilities.
Diane Rowsell
Roberts Arm, NL Canada
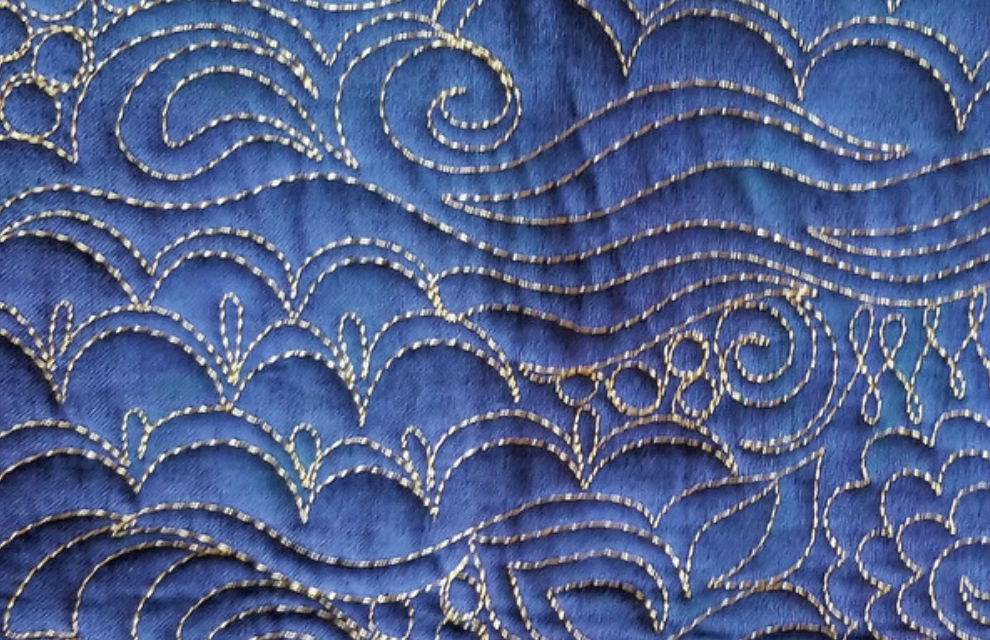
Hi love your videos . Can you tell me how to quilt over hand embroidery & machine embroidery.
Thanks for this blog post–complements your YouTube video perfectly!
I am so glad that you like it!!! I am having so much fun putting these together!
Loved the video and thanks so much for having a place where we can study the techniques you describe! See you at Quiltcon! (I’m in one of your classes.)
Angela, I love your blog! Your 5 aspects to show off is such a great start for quilting. I also think it’s important to think about how the quilting will look from across the room. I take a pic of the quilted top, print it in grayscale to fill the page, slip it in a sheet protector and draw my quilting plan with wet erase markers until I like what I see. Then I use my notes as a guide at my machine if nothing better changes my mind.
Loved your blog today! Get inspiration, I’m ready to go home from work and get started on mine!!
Thanks for this video series. I have been itching to do something different with my Longarm, but had no idea where to start. I am so inspired, I am putting a top on the machine today!!!
There is no wrong way to quilt your quilts! That is what is needed to hear! I have been struggling with the question of “when is a quilt over quilted”! Thanks for your blog series I will be following closely!
Thank you for the new series. I already know how I will apply this advice.
Looking forward to this series! You are always interesting, informative and fun!
Thanks!
YEA!!! I have your book…shape to shape and love it…but will certainly look forward to this series!!!! Great inspiration!!!! Thanks so much!
Thanks for this post. I have several of your books and one of your Craftsy classes and they have inspired me a lot. I have made real progress in FMQing a bunch of UFOs in the last 2-3 months. I am now stuck with a very busy top with a zillion tiny scrappy pieces and no real background, yet I know I want to custom quilt it on my DSM. I am stubborn like that. I printed a bunch of pics of the quilt and I doodle every day on the pics to get ideas.
I observe what type of lines are dominant in the piecing (your ‘Y’ example) and try the opposite. Your first photo is a perfect example. Great post! Thanks………..
Such great advice! I so look forward to the rest of the series! You are a natural!
Such excellent and to the point advice – thank you so, so much!!
Recently bought a Bernina Q20 but hesitant at quilting my many completed tops until I am proficient. Think I’ll just get on with them using your great tips and ideas. Thanks Angela.
Me, too! I’m absolutely new to free motion and I bought the q20. I went to Angela’s shop with a finished pieced too and her staff and I talked designs and thread colors. I left feeling confident and quilted that quilt on the Q—it was a blast and the machine became my friend. So do it. Angela’s videos and help is all over the place, in her books-yep I bought them all and in her store. WE can do it too! Have fun
The best way to get proficient at quilting is to work on quilt tops! Let me know if you have any questions!
Thanks for all the good tips! How do we translate that information to customers??
LOL, I hear ya!
Love all your tips….keep’em coming!
Wow! Did I need this. Just finished a miniature “shadow block” quilt and had no idea how to quilt it. Now I have some ideas. Thanks!
Great advice. Had to laugh at carpal tunnel/tiny pebbles comment, I think I’ve finished my first and probably last tiny pebbles on a quilt. And F.F.F. too funny. Love your book with Tula, SO many ideas.
Right?!?! It’s true though, there’s the moment you are so happy to just be done with the quilt!
You don’t mention it, but are you using rulers in some of the echo samples . I haven’t ventured into using them yet, but like the results.
On the curves, I just freehand the echoes, but on the straight lines, I will use a ruler. Hope that helps!
Thank you very much. I love your quilting and these ideas are perfect and very useful!
Perfect timing! One of the hardest things for me to decide….what to put on a quilt.
Trust me! You’re not alone!!!
Thanks again, Angela! You keep me moving on, encouraged, inspired, equipped, and growing as a quilter!
Aww, so glad that you found it helpful!
Thank you!! Looking forward to the next blogs!!
Very helpful; thank you. I look forward to the rest of the series.
I just taught a quilting class yesterday and much of this is what I talked about. A great reinforcement that I did a good job for my students
Looking forward to more in the series.
Thank you for the ideas. I’ve been quilting on my longarm for over 7 years. Usually I can figure a quilt out pretty quickly, but every once in a while, I’m stuck! I just got one this week from a customer who said “just work your magic”. Now I’m wondering what the heck to do. I look forward to this series.
Don’t you love that?!?! I always ask them, “what kind of quilting do you NOT like”. That’s always very, very good to know!
What wonderful advice! I’m new to FMQ and have found deciding what to quilt is almost paralyzing. I know your posts will go far in helping me thru this difficult past of the process. Thank you so much!
Great post and wonderful advice! Thank you for taking the time to give such great instruction and examples. I look forward to seeing this whole series!
Great post! I shared it with our guild. Thank you for such great advice.
Wonderful post. So thought-provoking! Makes me itch to get to work quilting my next quilt top, which is waiting for me to finish binding the last one.
Great post, Angela! I am looking forward to the rest of your series. For me, the quilting is both the most challenging and the most rewarding part of the quiltmaking process. I am gradually learning to both “read” and “listen to” the quilt to determine how IT wants to be quilted. When I choose well the results can be most enjoyable!
Thanks for another great post. I love your tips, and your sense of humor.
Angela, thank you for doing this series. Great ideas and always so inspiring to look at your works of art!
Great ideas! But how is it that your quilting in the “X” blocks look a lot like trapunto (at least on my laptop)? Did you do something special there? Thanks.
No, it’s just the shadow of the lighting. It does look like trapunto though!
I am looking forward to following this series and love the topic. I find that I am too critical of myself, seeking perfection, and sometimes I stare at a quilt top feeling almost paralyzed because I can’t decide what to do with it. One thing that I struggle with is planning a designs with as few stops and starts as possible to avoid tying off and burying threads, and how many times is it okay to backtrack over the stitching lines to avoid too much thread buildup? Thank you SO much for sharing your wisdom with us!
I promise it gets easier the more quilts that you work on!
Thank you so much. Great tips…looking forward to the react. Again, thanks.
Wow, good timing! Newbie here with my second quilt on my new longarm and I need practice but want to pull together an overall cohesive design. I’m using your shape by shape book but also grateful for the pointers in this blog. I’m a quilter not a piecer so I have big Hst to play in?.i look forward to future posts, thanks so much.
Great tips. What to quilt is hard for me. I am still practicing my actual quilting but improving all the time. Thanks for this series and all you do for us quilters.
Thank you – this was enlightening!